Taking the DIY route for phone repairs can be both cost-effective and empowering, especially if you’re handy with tools and have a knack for problem-solving. Whether you’re dealing with a cracked screen, a battery that won’t hold a charge, or other common phone issues, having the right tips, tools, and knowledge can help you successfully repair your device. This guide will walk you through the essentials of DIY phone repair, from preparing your workspace to tackling some of the most common problems.
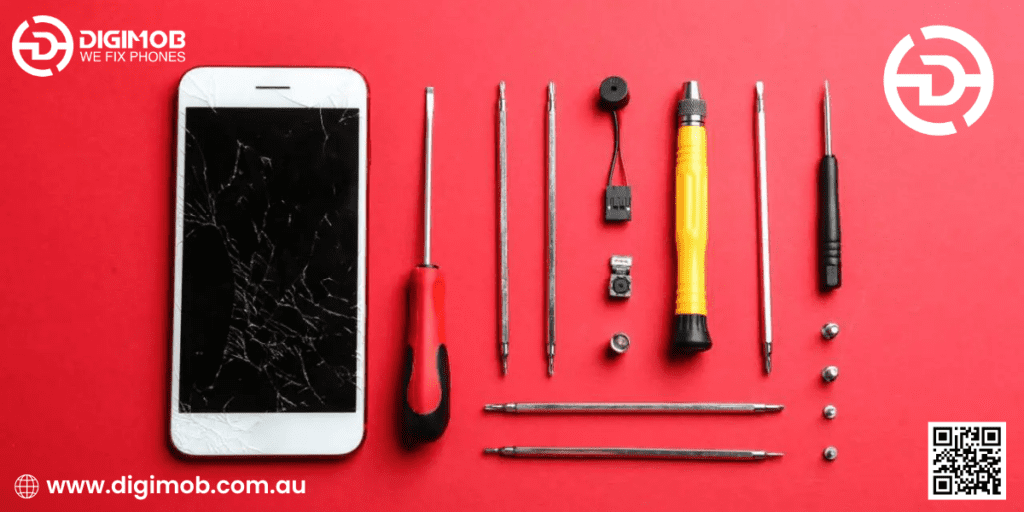
Essential Tools for DIY Phone Repair
Before you begin any repair, it’s crucial to have the right tools on hand. Some of the essential tools for phone repair include:
- Precision Screwdriver Set: Most phones use small screws that require a precision screwdriver set, typically with a range of Torx, Phillips, and flathead screwdrivers.
- Plastic Pry Tools and Spudgers: These tools help you safely open your phone’s casing without damaging internal components. They’re essential for separating screens, removing batteries, and accessing internal parts.
- Tweezers: Fine-tipped tweezers are useful for handling small components like screws, connectors, and cables.
- Suction Cup: A suction cup can help you lift screens off the device, especially on phones with glued components like the iPhone.
- Heat Gun or Hair Dryer: Some phones use adhesive to secure parts, such as the screen. A heat gun or hair dryer can soften the adhesive, making it easier to remove these parts.
- Anti-Static Wrist Strap: This tool prevents static electricity from damaging your phone’s delicate internal components during repairs.
Preparing for a DIY Phone Repair
Preparation is key to a successful DIY repair. Start by creating a clean, organized workspace with good lighting. A clutter-free environment reduces the risk of losing small components or damaging your phone during the repair. Make sure you have all the necessary tools and a repair guide or tutorial specific to your phone model. It’s also wise to back up your data before starting the repair, just in case something goes wrong.
Gather all the components you’ll need, such as replacement parts and any specialized tools mentioned in your repair guide. If you’re dealing with a cracked screen, for example, ensure you have a compatible replacement screen and the adhesive required to secure it. Having everything ready before you start can prevent interruptions and make the repair process smoother.
Common DIY Phone Repairs
Many phone repairs can be done at home with the right tools and a bit of patience. Here are some of the most common DIY repairs and how to tackle them:
- Screen Replacement: Cracked screens are one of the most frequent issues. To replace a screen, use a heat gun to soften the adhesive around the edges, then gently lift the screen with a suction cup and pry tool. Disconnect any ribbon cables carefully, replace the screen, and reassemble.
- Battery Replacement: If your phone’s battery isn’t holding a charge, it might be time for a replacement. Remove the back cover, disconnect the old battery, and replace it with a new one. Be careful not to puncture the battery during removal.
- Charging Port Repair: A faulty charging port can cause charging issues. Depending on the model, you might need to desolder the old port and solder a new one in its place. If you’re not comfortable with soldering, this might be a job best left to professionals.
- Replacing Buttons: Worn-out or unresponsive buttons can often be replaced or repaired. This usually involves opening the phone, removing the defective button, and replacing it with a new one. Ensure you align everything correctly before reassembly.
- Fixing Audio Issues: Problems with the speaker or microphone often require cleaning or replacing the affected component. Check for any debris or dust that might be blocking the sound, and if necessary, replace the faulty part.
Tips for a Successful DIY Repair
- Follow a Guide: Always follow a step-by-step repair guide or video tutorial specific to your phone model. This helps you avoid mistakes and ensures you know what to expect at each stage of the repair.
- Be Patient: Rushing through a repair increases the chances of making mistakes. Take your time, especially when dealing with delicate components.
- Keep Track of Parts: Organize screws and small parts using a magnetic mat or small containers. This prevents losing pieces and makes reassembly easier.
- Test Before Reassembly: Before fully reassembling your phone, test the repair to ensure everything works. For example, if you’ve replaced the screen, turn on the phone and check for touch sensitivity and display quality.
- Stay Safe: Avoid working on your phone near water or in a humid environment, and use an anti-static wrist strap to protect the internal components from static electricity.
Knowing When to Seek Professional Help
While many repairs can be done at home, some issues are better handled by professionals. If your phone has severe liquid damage, motherboard problems, or if you’re not confident in your ability to complete a repair, it’s wise to seek professional assistance. Attempting a repair that’s beyond your skill level can result in further damage to your phone, potentially making it irreparable.
Troubleshooting Common DIY Phone Repair Challenges
Even with the best preparation, DIY phone repairs can sometimes present unexpected challenges. Understanding how to troubleshoot these issues can save you time and frustration.
- Difficulty Removing Screws: Phone manufacturers often use specialized screws that can be difficult to remove without the correct screwdriver. If you’re having trouble, ensure you’re using the right size and type of screwdriver for the job. Applying a bit of downward pressure while turning can help prevent stripping the screw. If a screw is stripped, you might need a screw extractor tool to remove it.
- Screen Not Responsive After Replacement: After replacing a screen, you may find that the touch functionality isn’t working. This could be due to a loose or improperly connected ribbon cable. Reopen the device, carefully disconnect and reconnect the screen cables, ensuring they are securely in place. Also, check for any debris or dust that might be interfering with the connection.
- Phone Won’t Power On After Repair: If your phone doesn’t turn on after a repair, double-check all connections, especially the battery. Ensure that all components are properly seated and that no cables are pinched during reassembly. If everything seems in order and the phone still won’t power on, try performing a soft reset or connecting it to a charger to rule out battery issues.
- Overheating During Use: If your phone begins to overheat after a DIY repair, it could be due to improper reassembly or a damaged component. Make sure that heat-dissipating components like thermal paste or pads are correctly applied. If the problem persists, it could indicate a more serious issue that might require professional diagnostics.
- Poor Display Quality After Screen Replacement: If the new screen shows poor color accuracy, low brightness, or other display issues, it could be a sign of a faulty replacement part. Always purchase replacement parts from reputable sources to ensure quality. If the display issues occur despite using a high-quality part, double-check the connections and ensure that the screen is properly aligned and seated.
Sourcing Quality Replacement Parts
Finding quality replacement parts is crucial for a successful DIY repair. Not all parts are created equal, and using low-quality components can lead to poor performance or additional damage to your phone. When sourcing parts, consider the following tips:
- Purchase from Reputable Suppliers: Always buy from trusted suppliers who specialize in phone parts. Avoid generic or extremely cheap parts, as they are often of inferior quality.
- Check Compatibility: Ensure the parts you’re purchasing are compatible with your specific phone model. Even slight differences between models can result in parts that don’t fit or function correctly.
- Read Reviews: Look for reviews or testimonials from other customers who have used the same parts. Positive reviews can indicate that the parts are reliable and work as advertised.
- Consider OEM Parts: Original Equipment Manufacturer (OEM) parts are made by the same company that manufactured your phone. While they can be more expensive, they often offer better quality and compatibility than third-party parts.
- Warranty and Return Policy: Choose suppliers that offer a warranty or return policy on their parts. This way, if a part is defective or doesn’t work as expected, you can return or exchange it without losing your investment.
Safety Precautions During DIY Phone Repair
Safety should always be a priority when repairing your phone. While working with small components and electronics, it’s important to take steps to protect both yourself and your device.
- Power Off the Device: Always turn off your phone and disconnect it from any power source before starting the repair. This reduces the risk of short circuits or electrical shocks.
- Avoid Working Near Water: Conduct repairs in a dry, well-lit area. Water or moisture can cause additional damage to your phone and pose a safety risk.
- Handle Components with Care: Phone components are delicate and can be easily damaged. Use tools with soft, non-conductive tips, and handle all parts gently to avoid breaking them.
- Use an Anti-Static Wrist Strap: This device grounds you while you work, preventing static electricity from damaging sensitive phone components. It’s especially important when handling internal parts like the motherboard or battery.
- Proper Ventilation: If you’re using a heat gun, soldering iron, or any chemicals during the repair, make sure your workspace is well-ventilated to avoid inhaling fumes.
The Learning Curve of DIY Phone Repair
Embarking on a DIY phone repair can be a learning experience. Even if you’re new to phone repairs, the process can help you develop valuable skills and knowledge. It’s important to approach each repair with patience and a willingness to learn. The first few repairs might take longer than expected, and mistakes are part of the learning curve.
- Start with Simple Repairs: If you’re new to phone repair, start with easier tasks like replacing a battery or cleaning charging ports. As you gain confidence and experience, you can move on to more complex repairs.
- Document the Process: Take photos or notes as you disassemble your phone. This documentation can be invaluable when it’s time to reassemble the device, helping you remember where each part and screw belongs.
- Learn from Mistakes: If something goes wrong during a repair, view it as a learning opportunity. Troubleshoot the issue and research possible solutions. With each repair, you’ll improve your skills and reduce the likelihood of future mistakes.
- Join Online Communities: There are numerous online forums and communities dedicated to phone repair. Joining these groups can provide you with tips, advice, and support from more experienced repair enthusiasts.
- Practice Makes Perfect: The more repairs you do, the more comfortable and efficient you’ll become. With time, you’ll develop the skills to tackle even the most challenging phone repairs.
When DIY Isn’t the Best Option
While DIY repairs can save money and be rewarding, they’re not always the best choice. Knowing when to hand the job over to a professional can prevent further damage to your phone and avoid unnecessary stress.
- Complex Issues: Repairs involving the motherboard, severe liquid damage, or intricate soldering are best left to professionals. These tasks require specialized tools and expertise that go beyond basic DIY skills.
- Lack of Time: DIY repairs can be time-consuming, especially if it’s your first attempt. If you need your phone repaired quickly, taking it to a professional might be more efficient.
- No Tools or Experience: If you lack the proper tools or experience, attempting a DIY repair could lead to more harm than good. In such cases, it’s better to consult a professional who has the necessary equipment and knowledge.
- Under Warranty: If your phone is still under warranty, attempting a DIY repair can void it. In these situations, it’s wiser to use authorized repair services that won’t affect your warranty coverage.
- Risk of Further Damage: If you’re unsure about any part of the repair process or if something doesn’t seem right, it’s better to stop and seek professional help. Forcing a repair or continuing without understanding the issue can lead to permanent damage to your phone.
Conclusion
DIY phone repair can be a cost-effective and fulfilling way to keep your device in working order. With the right tools, preparation, and knowledge, you can tackle many common issues at home. However, it’s important to recognize your limits and know when to seek professional help. Whether you’re replacing a cracked screen or dealing with a more complex issue, this guide provides the foundation to approach DIY phone repairs with confidence and care.
Do you have gadget glitches? No worries! 🛠️ From laptops 🖥️ to iPhones 📱, MacBooks 💻 to iPads, and even Samsung, Android phones, and all other major brands, we’ve got you covered! 💼 Our team offers swift and reliable repairs for all your digital needs. 🚀 Visit digimob.com.au today!
DIY phone repair can be a rewarding and cost-effective way to keep your device in working order. With the right tools, preparation, and knowledge, you can tackle many common phone issues at home. However, it’s essential to know your limits and recognize when a professional repair might be the better option. Whether you’re fixing a cracked screen or replacing a battery, following this guide will help you approach DIY phone repairs with confidence.